Whether you’re combing through a 200-page contract, a research paper, or a company policy manual, manually scanning every line for a specific word or phrase is a waste of time. Fortunately, nearly every document format and platform — Word, PDF, Google Docs, web browsers, and even code editors — comes with a built-in search feature that can locate any keyword in seconds.
This guide walks you through exactly how to search in a document, covers the tools and shortcuts available across different platforms, and shares tips to make your searches faster and more accurate.
Why Searching in a Document Matters
Documents today are longer and more complex than ever. Reports, contracts, manuals, and knowledge bases can span dozens or hundreds of pages. Without a reliable way to search:
- You risk missing important clauses, deadlines, or figures.
- You waste valuable time scrolling and re-reading content.
- You’re more likely to make errors when comparing or editing large files.
Knowing how to search efficiently isn’t just a productivity trick — it’s essential for accuracy, especially in professional, legal, academic, or technical settings where a single missed keyword can lead to costly mistakes.
Step-by-Step: How to Search in a Document
Step 1: Open the Document
Start by opening the file in the application you normally use to view or edit it. This could be Microsoft Word, Adobe Acrobat Reader, Google Docs, a web browser (for HTML pages or web-based PDFs), or a code editor like VS Code. The exact search interface may look slightly different depending on the platform, but the underlying concept is the same everywhere.
Step 2: Trigger the Find Function
The universal shortcut for opening a search bar is:
- Windows/Linux:
Ctrl + F - Mac:
Cmd + F
Pressing this combination brings up a small search box, usually in the top-right corner of the screen or document window. This works in Word, Google Docs, most PDF readers, and virtually all modern web browsers.
If you’re working inside a mobile app, look for a magnifying glass icon in the toolbar or menu — tapping it opens the same kind of search field.
Step 3: Type Your Keyword or Phrase
Once the search bar appears, type in the word, phrase, or number you’re looking for. As you type, most applications will:
- Highlight every instance of the keyword in the document.
- Show a count of total matches found.
- Jump automatically to the first occurrence.
Be as specific as possible. Searching for a full phrase (e.g., “termination clause”) will return far more relevant results than a single generic word (e.g., “clause”).
Step 4: Navigate Between Matches
If your keyword appears multiple times, use the Next and Previous arrows (often represented as up/down or left/right chevrons next to the search box) to jump between occurrences one at a time. This is especially useful in long documents where you need to review each instance individually rather than relying on a single highlighted result.
Keyboard shortcuts can speed this up further:
- Press Enter to jump to the next match.
- Press Shift + Enter to go back to the previous match.
Step 5: Refine Your Search with Advanced Options
Most modern applications offer advanced search settings that help narrow down results:
- Match Case: Finds only exact uppercase/lowercase matches (useful for names, acronyms, or code).
- Whole Word: Prevents partial matches — for example, searching “cat” won’t also return “category.”
- Regular Expressions (Regex): Allows pattern-based searching, useful for developers or advanced users hunting for specific formats like email addresses or dates.
In Word and Google Docs, these options are usually found by clicking a small gear icon or “More options” link within the search panel. In browsers, right-clicking the search bar sometimes reveals similar settings.
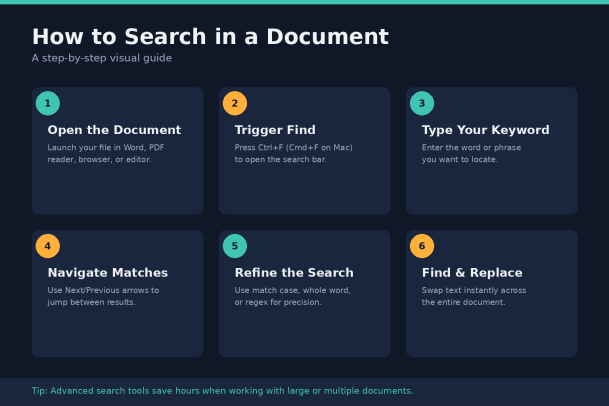
Step 6: Use Find and Replace for Editing
If your goal isn’t just to locate text but to change it, use the Find and Replace feature:
- Windows/Linux:
Ctrl + H - Mac:
Cmd + Option + F(varies slightly by application)
This tool lets you search for a keyword and instantly swap it with new text — either one instance at a time or across the entire document with a single click on “Replace All.” This is especially valuable when updating names, dates, terminology, or correcting recurring typos in lengthy files.
Searching Across Multiple Documents
The steps above work well for a single file, but what if you need to search across dozens or hundreds of documents at once — such as archived reports, shared drives, or a company knowledge base? In these cases, standard Find (Ctrl+F) won’t help, since it only searches the file currently open.
For multi-document searches, you typically need:
- File explorer or cloud drive search bars (Windows Search, Google Drive search, SharePoint search) to locate files by name or content.
- Dedicated search or indexing software that scans file contents across folders and drives, rather than just file names.
- Enterprise content management or endpoint tools that index documents across an organization for fast, centralized search — particularly important for businesses managing sensitive or high-volume data.
This is also where security matters. When documents contain sensitive information, the way you search, store, and access files should be paired with strong endpoint protection to prevent unauthorized access to that content.
Common Search Problems and How to Fix Them
“My search isn’t finding a word I know is in the document.” Check for typos in your search term, extra spaces, or hidden formatting (like line breaks in the middle of a word). If the document is a scanned PDF or image-based file, text search won’t work at all — you’ll need to run Optical Character Recognition (OCR) first to convert the image into searchable text.
“Ctrl+F isn’t opening a search bar.” Some applications override this shortcut for their own function. Check the application’s Edit menu for a “Find” option, or consult its help documentation for the correct shortcut.
“Search is too slow in a very large document.” Very large files (100+ pages or several megabytes) can slow down in-app search. Consider breaking the document into sections, using desktop indexing tools, or switching to a more powerful PDF reader designed for large files.
Best Practices for Faster, More Accurate Searches
A search feature is only as good as the way you use it. A few habits can make a real difference in how quickly and reliably you find what you need:
- Search for unique phrases, not single words. A distinctive multi-word phrase almost always narrows results faster than a common single word.
- Start broad, then narrow. If an exact phrase returns zero results, try a shorter or partial version of it before assuming the term isn’t in the document.
- Clear the search bar between searches. Leftover text from a previous search can sometimes affect how new results are highlighted or counted.
- Use bookmarks or comments for repeat lookups. If you find yourself searching for the same section repeatedly, consider adding a bookmark, heading, or comment so you can jump to it directly next time.
- Combine search with the table of contents. In long, well-structured documents, jumping to a relevant section first — then searching within it — is often faster than searching the entire file.
Searching in Specific Applications
While the core shortcut (Ctrl+F / Cmd+F) is nearly universal, a few applications have their own quirks worth knowing:
- Microsoft Word: Search opens in a sidebar called the Navigation Pane, which also shows thumbnails of every page containing a match.
- Google Docs: Find and Replace opens as a small floating bar, and it automatically syncs with Google Drive’s broader search when you’re looking across multiple files.
- Adobe Acrobat/PDF readers: Larger PDFs may prompt you to run OCR first if the text isn’t selectable, since scanned pages are essentially images rather than searchable text.
- Web browsers: Browser-based Find typically only searches the visible page content, so if a page loads more content dynamically (like infinite-scroll articles), you may need to scroll further before searching again.
Quick Reference: Keyboard Shortcuts
| Action | Windows/Linux | Mac |
|---|---|---|
| Open Find | Ctrl + F | Cmd + F |
| Find and Replace | Ctrl + H | Cmd + Option + F |
| Next Match | Enter | Enter |
| Previous Match | Shift + Enter | Shift + Enter |
Final Thoughts
Searching in a document doesn’t have to be complicated. With a simple keyboard shortcut, you can locate any word or phrase in seconds, navigate through multiple matches, and even make bulk edits with Find and Replace. For everyday tasks, these built-in tools are more than enough.
But when your organization is managing large volumes of sensitive documents across teams, devices, and drives, basic search functions aren’t enough to keep that data organized — or protected. That’s where having the right endpoint security and data management strategy in place makes all the difference, ensuring your documents stay both searchable and secure.
Ready to protect and manage your organization’s documents with confidence?
Request a Demo with Xcitium and see how Xcitium’s security solutions help keep your files, data, and endpoints safe while your team works faster and smarter.
Please give us a star rating based on your experience.


 (22 votes, average: 2.27 out of 5, rated)